Learn Hibernate Example Using Annotations
Now a days it is common practice to develop hibernate application using annotation. There are many annotations used in hibernate some of basic which are necessary are @Entity, @Id, @Table and others.
Hibernate Annotations are based on the JPA 2 specification and supports all the features. All JPA annotations are imported from javax.persistence package. There is EntityManager which implements the interfaces and life cycle defined by the JPA specification.
The main advantage of using hibernate annotation is that we don't need to create separate mapping (hbm) file. Annotations their-selves provide meta data.
Example to create the hibernate application with Annotation
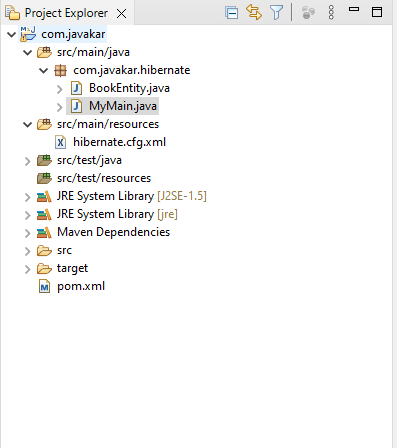
We start building project by launching Eclipse IDE. Follow the steps bellow for creating hibernate application using Eclipse IDE.
1) Create the Maven Project
Follow the steps in the link to configure hibernate in your project.
2) Create the Persistence or Entity class.
@Entity annotation tells that this class is an entity.
@Table annotation specifies the name of the table where the data of this entity is to be persisted. If you do not use the @Table annotation, hibernate will use the class name as the table name by default.
@Id annotation defines the identifier for this entity.
@Column annotation describes the details of column for property or field. If @column annotation is not specified, the property name will be used as the default column name.
import javax.persistence.*;

@Entity
@Table(name = "book", schema = "hibernate_db")
public class BookEntity {

    @Id
    @GeneratedValue(strategy = GenerationType.IDENTITY)
    private Integer id;
    @Column(nullable = false, name = "book_name")
    private String name;

    public Integer getId() {
        return id;
    }

    public void setId(Integer id) {
        this.id = id;
    }

    public String getName() {
        return name;
    }

    public void setName(String name) {
        this.name = name;
    }
}
3) Create the Configuration file.
hibernate.cfg.xml
<?xml version="1.0" encoding="UTF-8"?>
<!DOCTYPE hibernate-configuration PUBLIC
        "-//Hibernate/Hibernate Configuration DTD 3.0//EN"
        "http://hibernate.org/dtd/hibernate-configuration-3.0.dtd">
<hibernate-configuration>
    <session-factory>
        <property name="hibernate.connection.driver_class">com.mysql.jdbc.Driver</property>
        <property name="hibernate.connection.url">jdbc:mysql://localhost:3306/hibernate_db</property>
        <property name="hibernate.connection.username">root</property>
        <property name="hibernate.connection.password">root</property>
        <property name="hibernate.connection.pool_size">1</property>
        <property name="hibernate.current_session_context_class">thread</property>
        <property name="hibernate.show_sql">true</property>
        <property name="hibernate.dialect">org.hibernate.dialect.MySQLDialect</property>

    </session-factory>
</hibernate-configuration>
4) Create a class namely MyMain.java that will store and retive persistent object.
MyMain.java
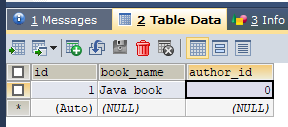
import org.hibernate.Session;
import org.hibernate.SessionFactory;
import org.hibernate.cfg.Configuration;
import java.util.List;

public class MyClass {

    public static void main(String[] arg) {
        try {
            Configuration conf = new Configuration();
            conf.configure("hibernate.cfg.xml");
            conf.addAnnotatedClass(BookEntity.class);
            SessionFactory sf = conf.buildSessionFactory();

            Session session = sf.openSession();
            session.beginTransaction();
            BookEntity book = new BookEntity();
            book.setName("Java book");
            session.save(book);
            session.getTransaction().commit();
        } catch (Exception e) {
            e.printStackTrace();
        }
    }
}
To run the hibernate application, right click on the MyMain class Run As - Java Application.

Aamir Shayan
Software Engineer